Installing the NAS from scratch
6 min · 7 sections
This guide covers the very first thing: taking an empty computer and turning it into your NAS, with the panel open in your browser. It is three things — download, write a USB stick and install — and the machine does the last one on its own.
What you need: a computer with at least 2 GB of memory and a disk, a USB stick of 2 GB or more, and another computer to write it from.
The machine's disk is wiped COMPLETELY. The installer does not ask and there is no going back. If that computer holds anything you care about, take it off first.
1. Download the image
It is at lgm-os.com/descargar. It is a .iso file of about 700 MB. Let it download completely before you continue; a truncated download will not boot.
2. Write the USB stick
An .iso is not copied onto a USB stick like an ordinary file: it has to be written, and that needs a program. The simplest is balenaEtcher, which works the same on Windows, Mac and Linux: download it from balena.io/etcher, open it, and it is three buttons — pick the image, pick the stick, write.
Everything on the stick is erased. And check twice which one you picked: choose the wrong drive and you erase that one.
If you would rather use the command line:
- Linux:
sudo dd if=lgm-os-installer.iso of=/dev/sdX bs=4M status=progress oflag=sync(replacesdXwith your stick; check it withlsblkfirst). - macOS:
sudo dd if=lgm-os-installer.iso of=/dev/rdiskN bs=4m(diskutil listto find which one). - Windows: use balenaEtcher or Rufus;
ddis not included.
3. Boot from the USB stick
Plug the stick into the machine that will become the NAS and switch it on while pressing the key that opens the boot menu. Which key depends on the maker, and it usually flashes up on screen:
| Maker | Key |
|---|---|
| HP | F9 |
| Dell | F12 |
| Lenovo | F12 |
| Acer | F12 |
| ASUS | F8 or Esc |
| MSI, Gigabyte | F11 |
| Intel NUC | F10 |
Pick your USB stick from that list. If it is not there, go into the BIOS (F2 or Del) and check that USB booting is enabled.
4. The installation
Once it boots you will see this:
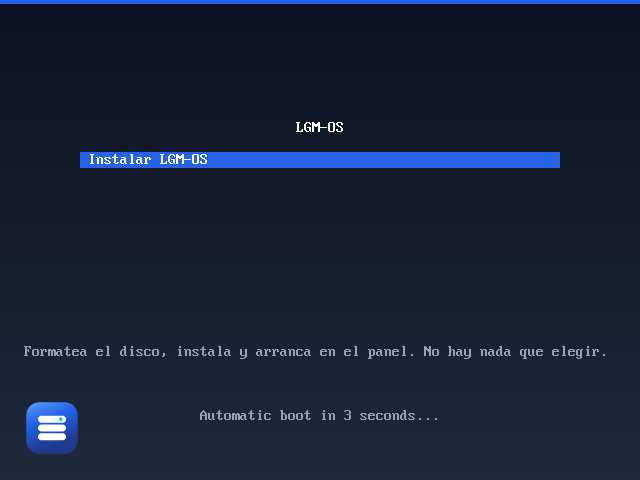
There is one option and it starts by itself after a few seconds: nothing to choose, nothing to touch. From here the machine works on its own.
It prepares the disk, downloads the system and installs it, all in one go and without asking:
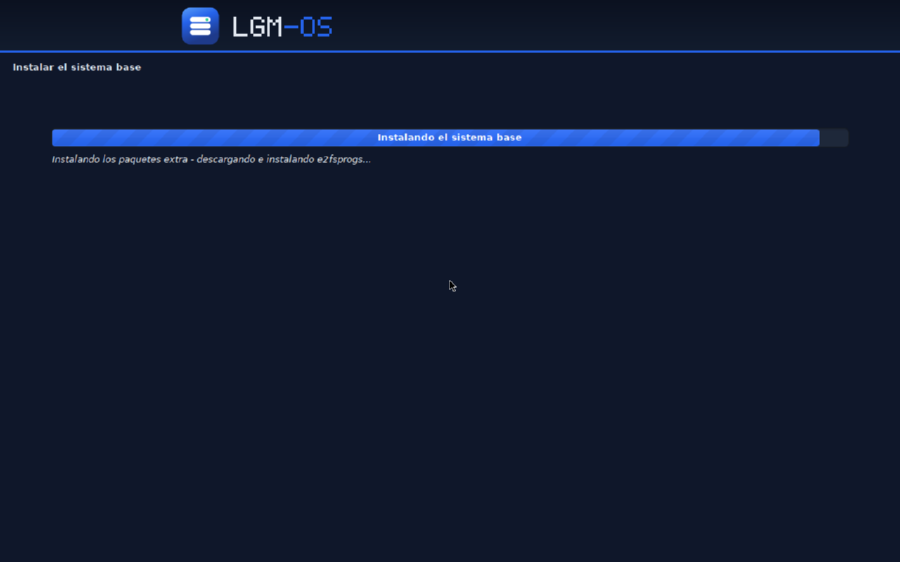
It takes between ten minutes and half an hour, depending on the machine and the network. Do not switch it off even if it looks stuck: there are stretches where it is downloading and the bar does not move.
If your network does not hand out addresses
Almost every home router hands out addresses on its own (DHCP) and you will never see this screen. If yours does not, the installer will ask you for the IP address, the netmask, the gateway and the DNS. That is the only thing it can ask you during the whole installation.
When it finishes
The machine restarts on its own and takes the USB stick out of the picture. On the NAS's own screen you will see this while it finishes getting ready:
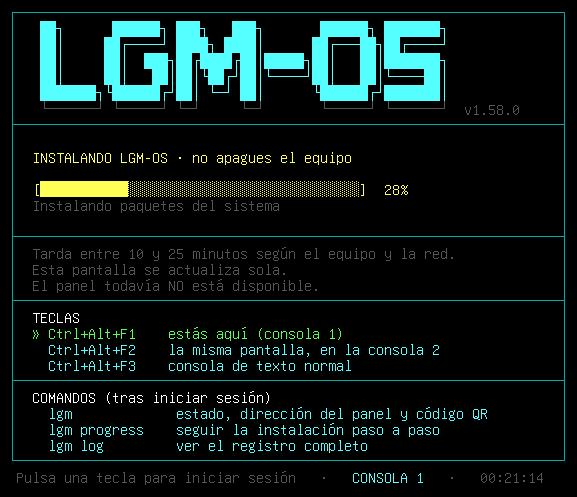
On this first boot the NAS downloads the latest version of LGM-OS and installs it. That is why it needs the internet, and why an image written a year ago still installs today's latest. The bar on that screen runs from 0 to 100 and updates itself.
5. Getting into the panel
That same screen shows the address. From any computer or phone in your home, open:
https://lgm-nas.local:5001The first time, your browser will warn that the certificate is not trusted: that is normal — the certificate was made by your own NAS. Go in anyway (“Advanced” → “Continue”), and once inside, under Control panel → External access, install the NAS's certificate on your devices: the warning goes away and you also get fingerprint sign-in and the panel as an app. See Installing the panel as an app.
The panel will ask you to create your administrator account. That is the only password you choose in the whole process, and the one you will use from now on:
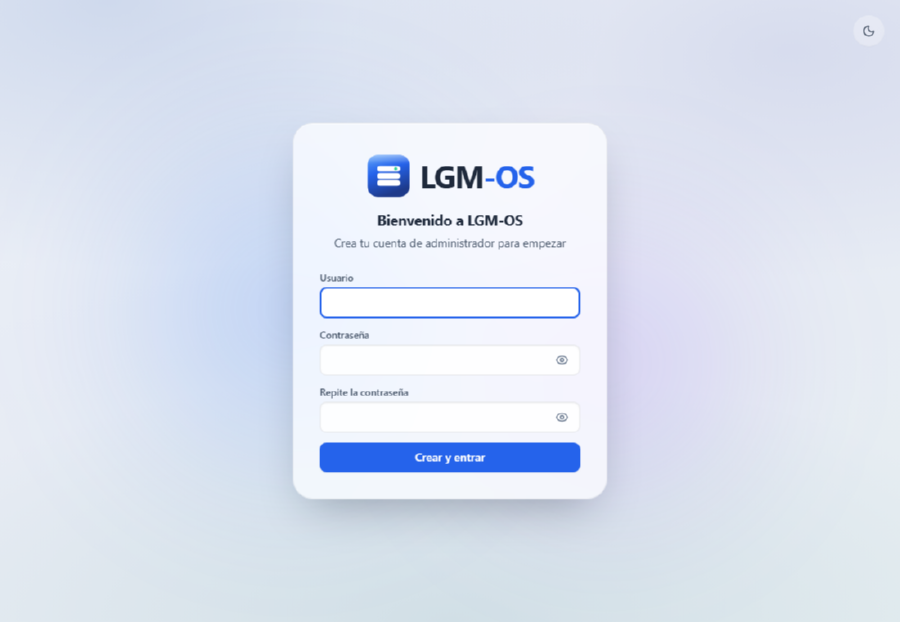
Go in by name, not by IP. Over lgm-nas.local you can use passkeys (fingerprint or face), install the panel as an app and view it offline. Over an IP address the browser allows none of the three. The addresses that reach your NAS are listed under Control panel → Addresses.
What next
- Administration guide — the first ten minutes with the NAS in front of you.
- Storage — creating the volume your data will live on. It is the next thing to do: until there is a volume, the NAS cannot store anything.
- Connecting your devices — making the NAS show up as another folder on Windows, Mac, Linux and your phone.
If something goes wrong
The machine will not boot from the stick. Almost always it is Secure Boot: turn it off in the BIOS. If the machine predates 2012, also check that USB booting is allowed.
It sits still for a long time. That is normal at two points: detecting disks, and downloading the base system. Give it half an hour before worrying.
An error comes up. Press Ctrl+Alt+F4: that is the installer's log, with the real reason. A photo of that screen is what is needed to work out what happened.
It finished, but the panel does not open. The NAS needs the internet on its first boot to download LGM-OS. If it had none, it waits and retries every minute: plug in the network cable and give it a couple of minutes.
The console account. The installer creates an account called lgm with a password that is different on every machine, generated during installation. You only need it if one day you are left without the panel and have to get in with a keyboard and screen, and it is written on the NAS's own screen until you create your administrator account — write it down if you think you will need it. After that it stops being shown, and it is read from the panel (Terminal) in /etc/lgm/clave-consola. The panel account is a separate thing and you choose it.